
Home Composting Made Easy
Composting is an eco-friendly way to recycle organic waste, turning it into nutrient-rich material for your garden. By composting at home, you can reduce the amount of waste sent to landfills, improve your garden’s soil, and even save money on store-bought fertilizers. This article will lead you through setting up a simple yet effective home composting system.
1. Choose the Right Location
To set up a successful composting system, select a convenient spot in your yard that is flat, well-drained, and receives partial sunlight. Avoid placing your compost pile directly under trees or areas prone to flooding. Accessibility is essential, so ensure the site is easily reachable for adding materials and turning the compost.
2. Pick a Composting Method
There are two primary methods of composting: bin and pile systems. Consider the following when choosing the correct method for you:
a. Bin systems: Compost bins are available in various sizes and materials, such as plastic, wood, or metal. These bins are convenient for smaller yards or, if you prefer, a more organized look. They also deter pests and keep your compost contained.
b. Pile systems: Composting piles are ideal if you have a larger outdoor space and are looking for a low-cost option. You can construct a simple bank by layering organic materials or build a more structured system using wooden pallets, wire mesh, or cinder blocks.
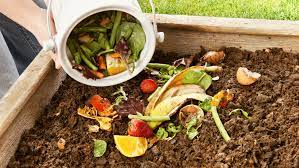
3. Collect the Right Materials
For a well-balanced compost, you need both “green” (nitrogen-rich) and “brown” (carbon-rich) materials. Aim for a 3:1 ratio of browns to greens to promote efficient decomposition.
Green materials include:
– Fruit and vegetable scraps
– Grass clippings
– Coffee grounds and filters
– Tea bags
– Fresh garden waste
Brown materials include:
– Dry leaves
– Small twigs and branches
– Straw or hay
– Shredded paper or cardboard
– Sawdust (from untreated wood)
Avoid adding the following materials to your compost:
– Meat, bones, and dairy products (attract pests and create odors)
– Diseased or insect-infested plants
– Weeds with mature seeds
– Pet waste
– Fats and oils
4. Layer Your Compost
Start your compost pile or bin with a layer of coarse brown materials, like small twigs or straw, to promote air circulation. Next, alternate layers of green and brown materials, adding a thin layer of garden soil or finished compost between each layer to introduce beneficial microbes. Keep layer thickness between 2 and 4 inches to ensure proper aeration.
5. Maintain Your Compost
Turn your compost regularly with a pitchfork or shovel to speed up the decomposition process and avoid unpleasant odors. This aerates the pile, distributing oxygen and promoting the growth of beneficial microorganisms. Aim to turn your compost every 1 to 2 weeks or when the pile’s center feels hot.
Keep your compost pile moist but not soggy by occasionally adding water or incorporating moisture-rich materials. The consistency should resemble a damp sponge.
6. Harvest Your Compost
After 3 to 6 months, your compost should be ready for use in your garden. The finished compost will be dark brown, crumbly, and have an earthy smell. To harvest, remove the outer layers of undecomposed material and use the finished compost to enrich your garden soil, fertilize plants, or create a nutrient-rich potting mix.
With a little effort and patience, setting up a home composting system can be a rewarding way to recycle organic waste.